
Painting a (juvenile) Channel-Billed Cuckoo (Alphabet Superset Project Part 3)

Part 3: C - Channel-Billed Cuckoo (juvenile)
Hello! So if you have no idea why this is Part 3, and what the Alphabet Superset Project is, check out the first post in the series. But also, here is a quick recap:
For the next few months, I will be painting an Australian animal or an animal that visits Australia that I’ve seen and preferably one I have my own photos of. I’m doing this as part of a project/challenge called the Alphabet Superset, the brainchild of Youtuber (among other things) Campbell Walker aka Struthless. My main reasons are to have a consistent means of slowly painting all the wonderful animals I’ve been lucky to see while we’d been camping around Australia in 2021 and 2022 (with a short stint in Darwin).
To find out more about the project, the best source is the Alphabet Superset page itself or Campbell Walker’s video about it.
To find out more about why I am doing this project, check out the first post in the series here. To see more of my paintings as part of this challenge, you can search for Alphabet Superset on this site or click on the Alphabet Superset category above.
What are Channel-Billed Cuckoos
Channel-Billed Cuckoos are very large cuckoos with quite a long tail and a huge, distinctive bill. THey’re also apparently the largest parasitic cuckoo in the world - they lay their eggs in the nests of other birds - mainly crows and other corvids, and their young outcompete the competition once hatched.
They actually look almost like hornbills and we were very surprised to see something with that sort of bill here. In fact, the Australian Bird Guide says “[s]ize, structure and forest canopy habitat recall unrelated hornbills of Asia and Africa.” The juvenile’s bill is not quite as pronounced as the adult bill, but still very distinctive.
The grey-black eyes and light brown feathers on the juvenile looks quite different from the adults which made this a bit of a challenge to identify initially.
According to the Bird Guide, Channel-Billed Cuckoos visit Australia for their breeding season around September to March although some remain until July. The Australian Museum’s site says they arrive around August to October and leave between January and March. That and the note in the Guide that said that only some birds retain their buff/beigy-brown tipped wings by the time they return to Australia at 1 years old made us feel quite special to see this little (actually very big) bird. We saw this little one in July 2022 in Kakadu National Park.
References and for more information about the Channel-Billed Cuckoo:
The Australian Bird Guide, 2019 revised edition, CSIRO Publishing, (click here for my blog post about the bird guide)
Channel-billed Cuckoo - The Australian Museum
Why Paint them?
There were a few good choices for the C category, including Carnaby’s Black Cockatoos but I picked this juvenile Channel-Billed Cuckoo because so far I’ve only seen one of these birds and it seemed like it was odd to have seen one that was so obviously a juvenile and in July, so it was a memorable sighting. We’d heard the interesting call of this bird, and luckily managed to get a couple of photos/videos.
Despite the Museum’s website saying it is difficult to confuse it for any other bird, it took me a while to work out what the bird was, and I’d initially discounted the Channel-Billed Cuckoo because it didn’t seem like we should have been seeing it when we did, and from our vantage point, its light brown head feathers were not initially very obvious. But there was literally nothing else it could be, and once Scott managed to get a good photo, we were sure.
Process - Part 1: Find Photo References, Sketch
I did not have a ton of references for this, but luckily one was a video, and videos are often so much better for being able to work out various angles, movements and the ability to pause allows for a lot more value than a single photograph. That said, the quality of our photos was better.
There weren’t tons of options for the composition of this piece, so that bit was fairly easy (although I really would’ve loved more photos!) The difficult part about this bird was going back and forth between a few different photos and various points in the video to get some clarity around the head, eyes and feathers.
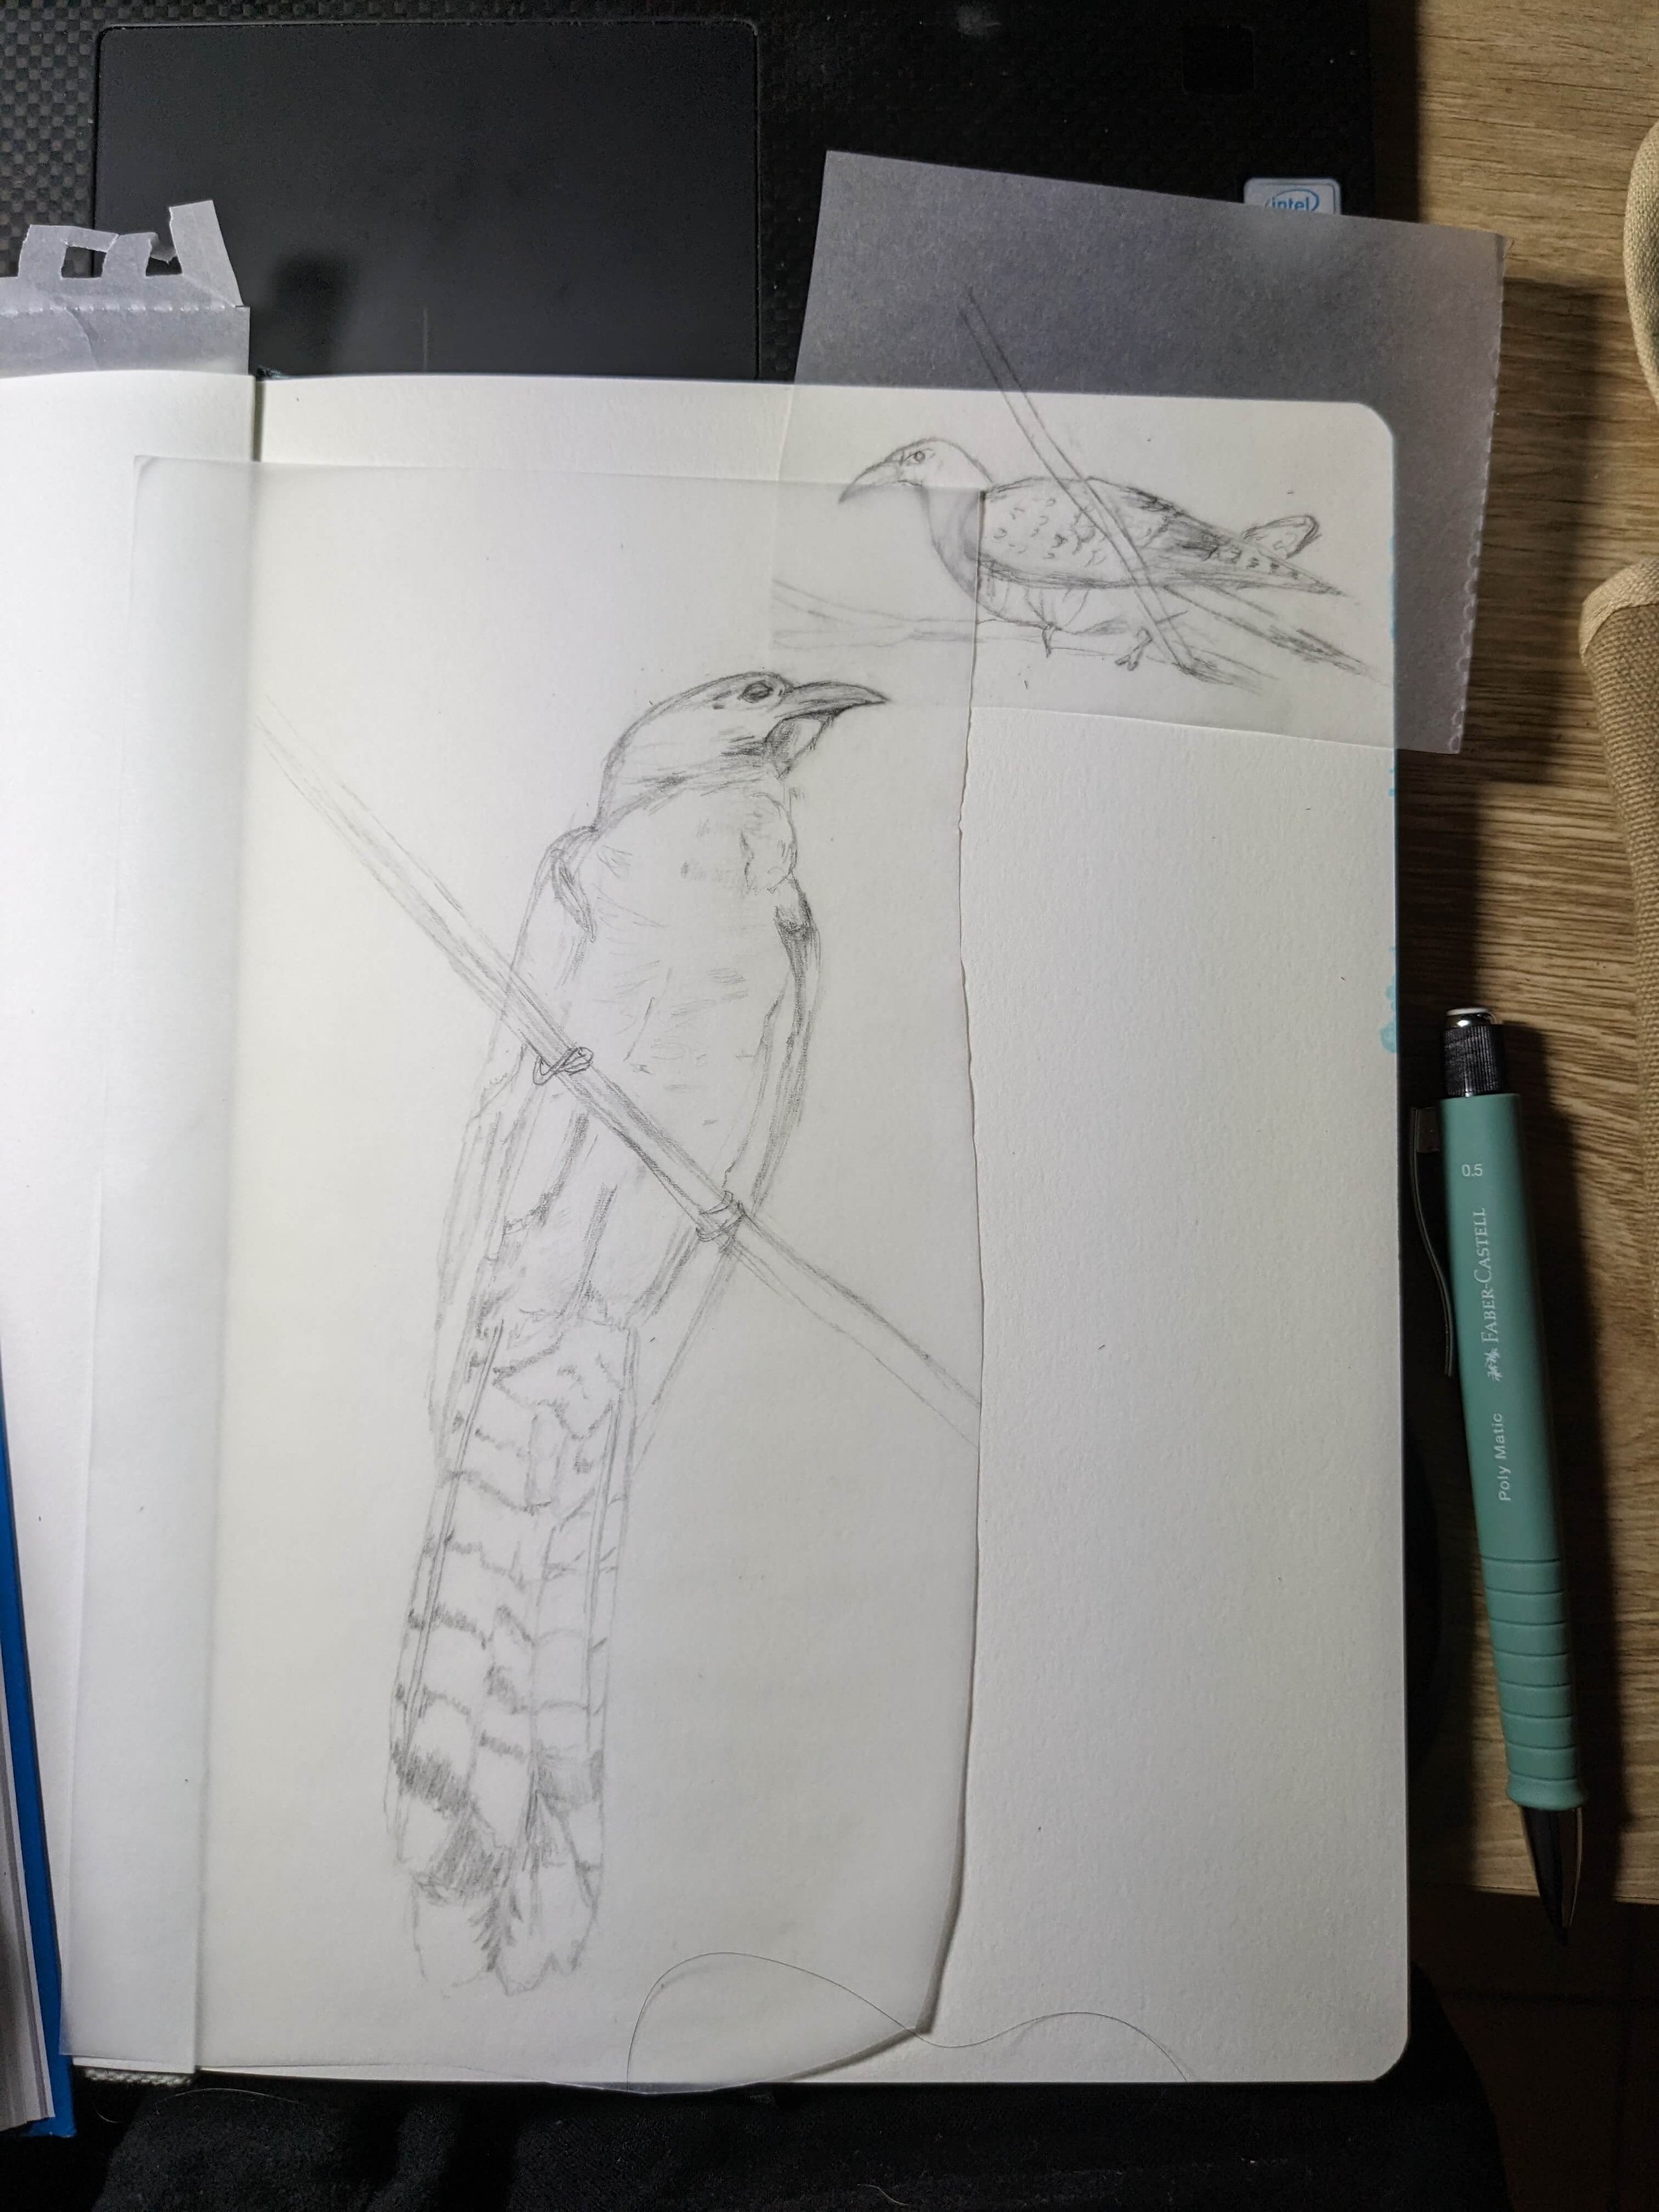
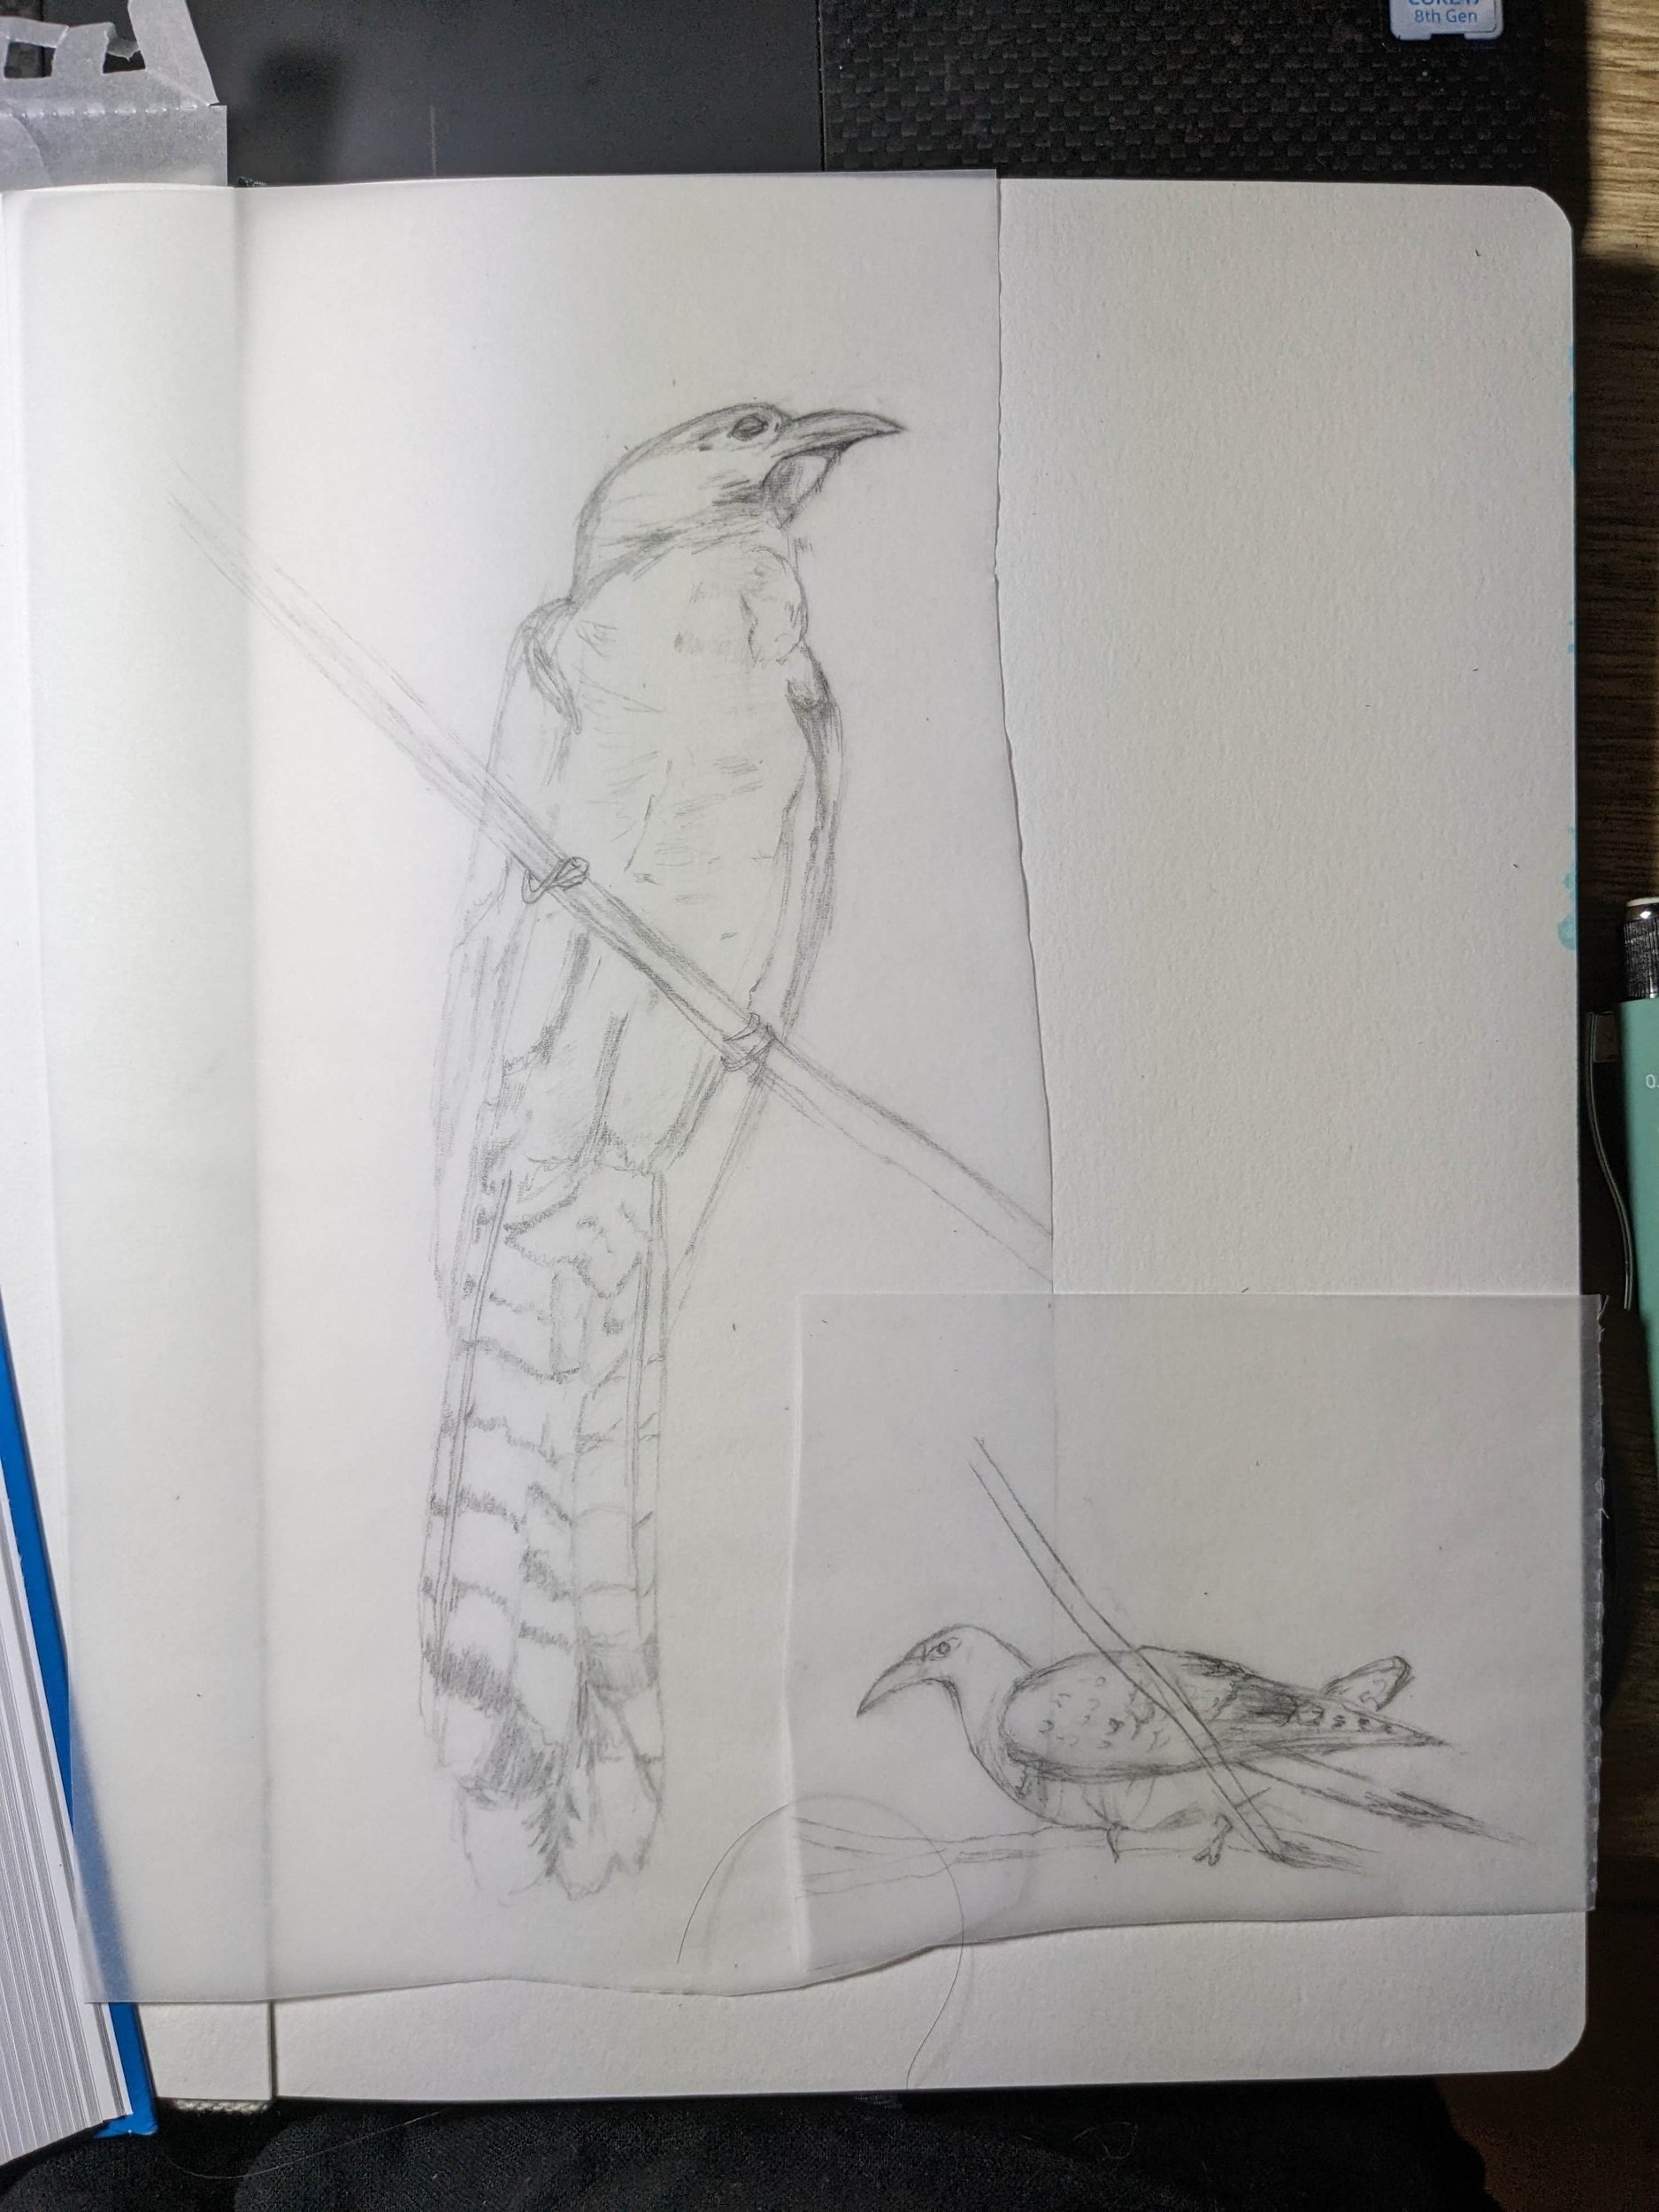
In the end, I still had to reference the Bird Guide where I needed some clarification on features like the eyes and bill. I’m not saying this piece is absolutely accurate, but it is much more accurate than if I didn’t have the bird book to look up.

I made a bit of a mistake with the proportions of the lower half in my initial sketch, but worked it out by roughly measuring the proportions before I started painting. Sometimes I find just eyeing it works, but other times, a ruler or some other way to gauge proportions is definitely needed.

Process - Part 2: Work out colours, paint the background
I’d only recently received my Holbein Irodori Gouache Autumn and Winter sets so one of my objectives was to test some of these colours out in a painting. For that reason, I ended up using a lot more colours than I normally would in a painting/sketch.
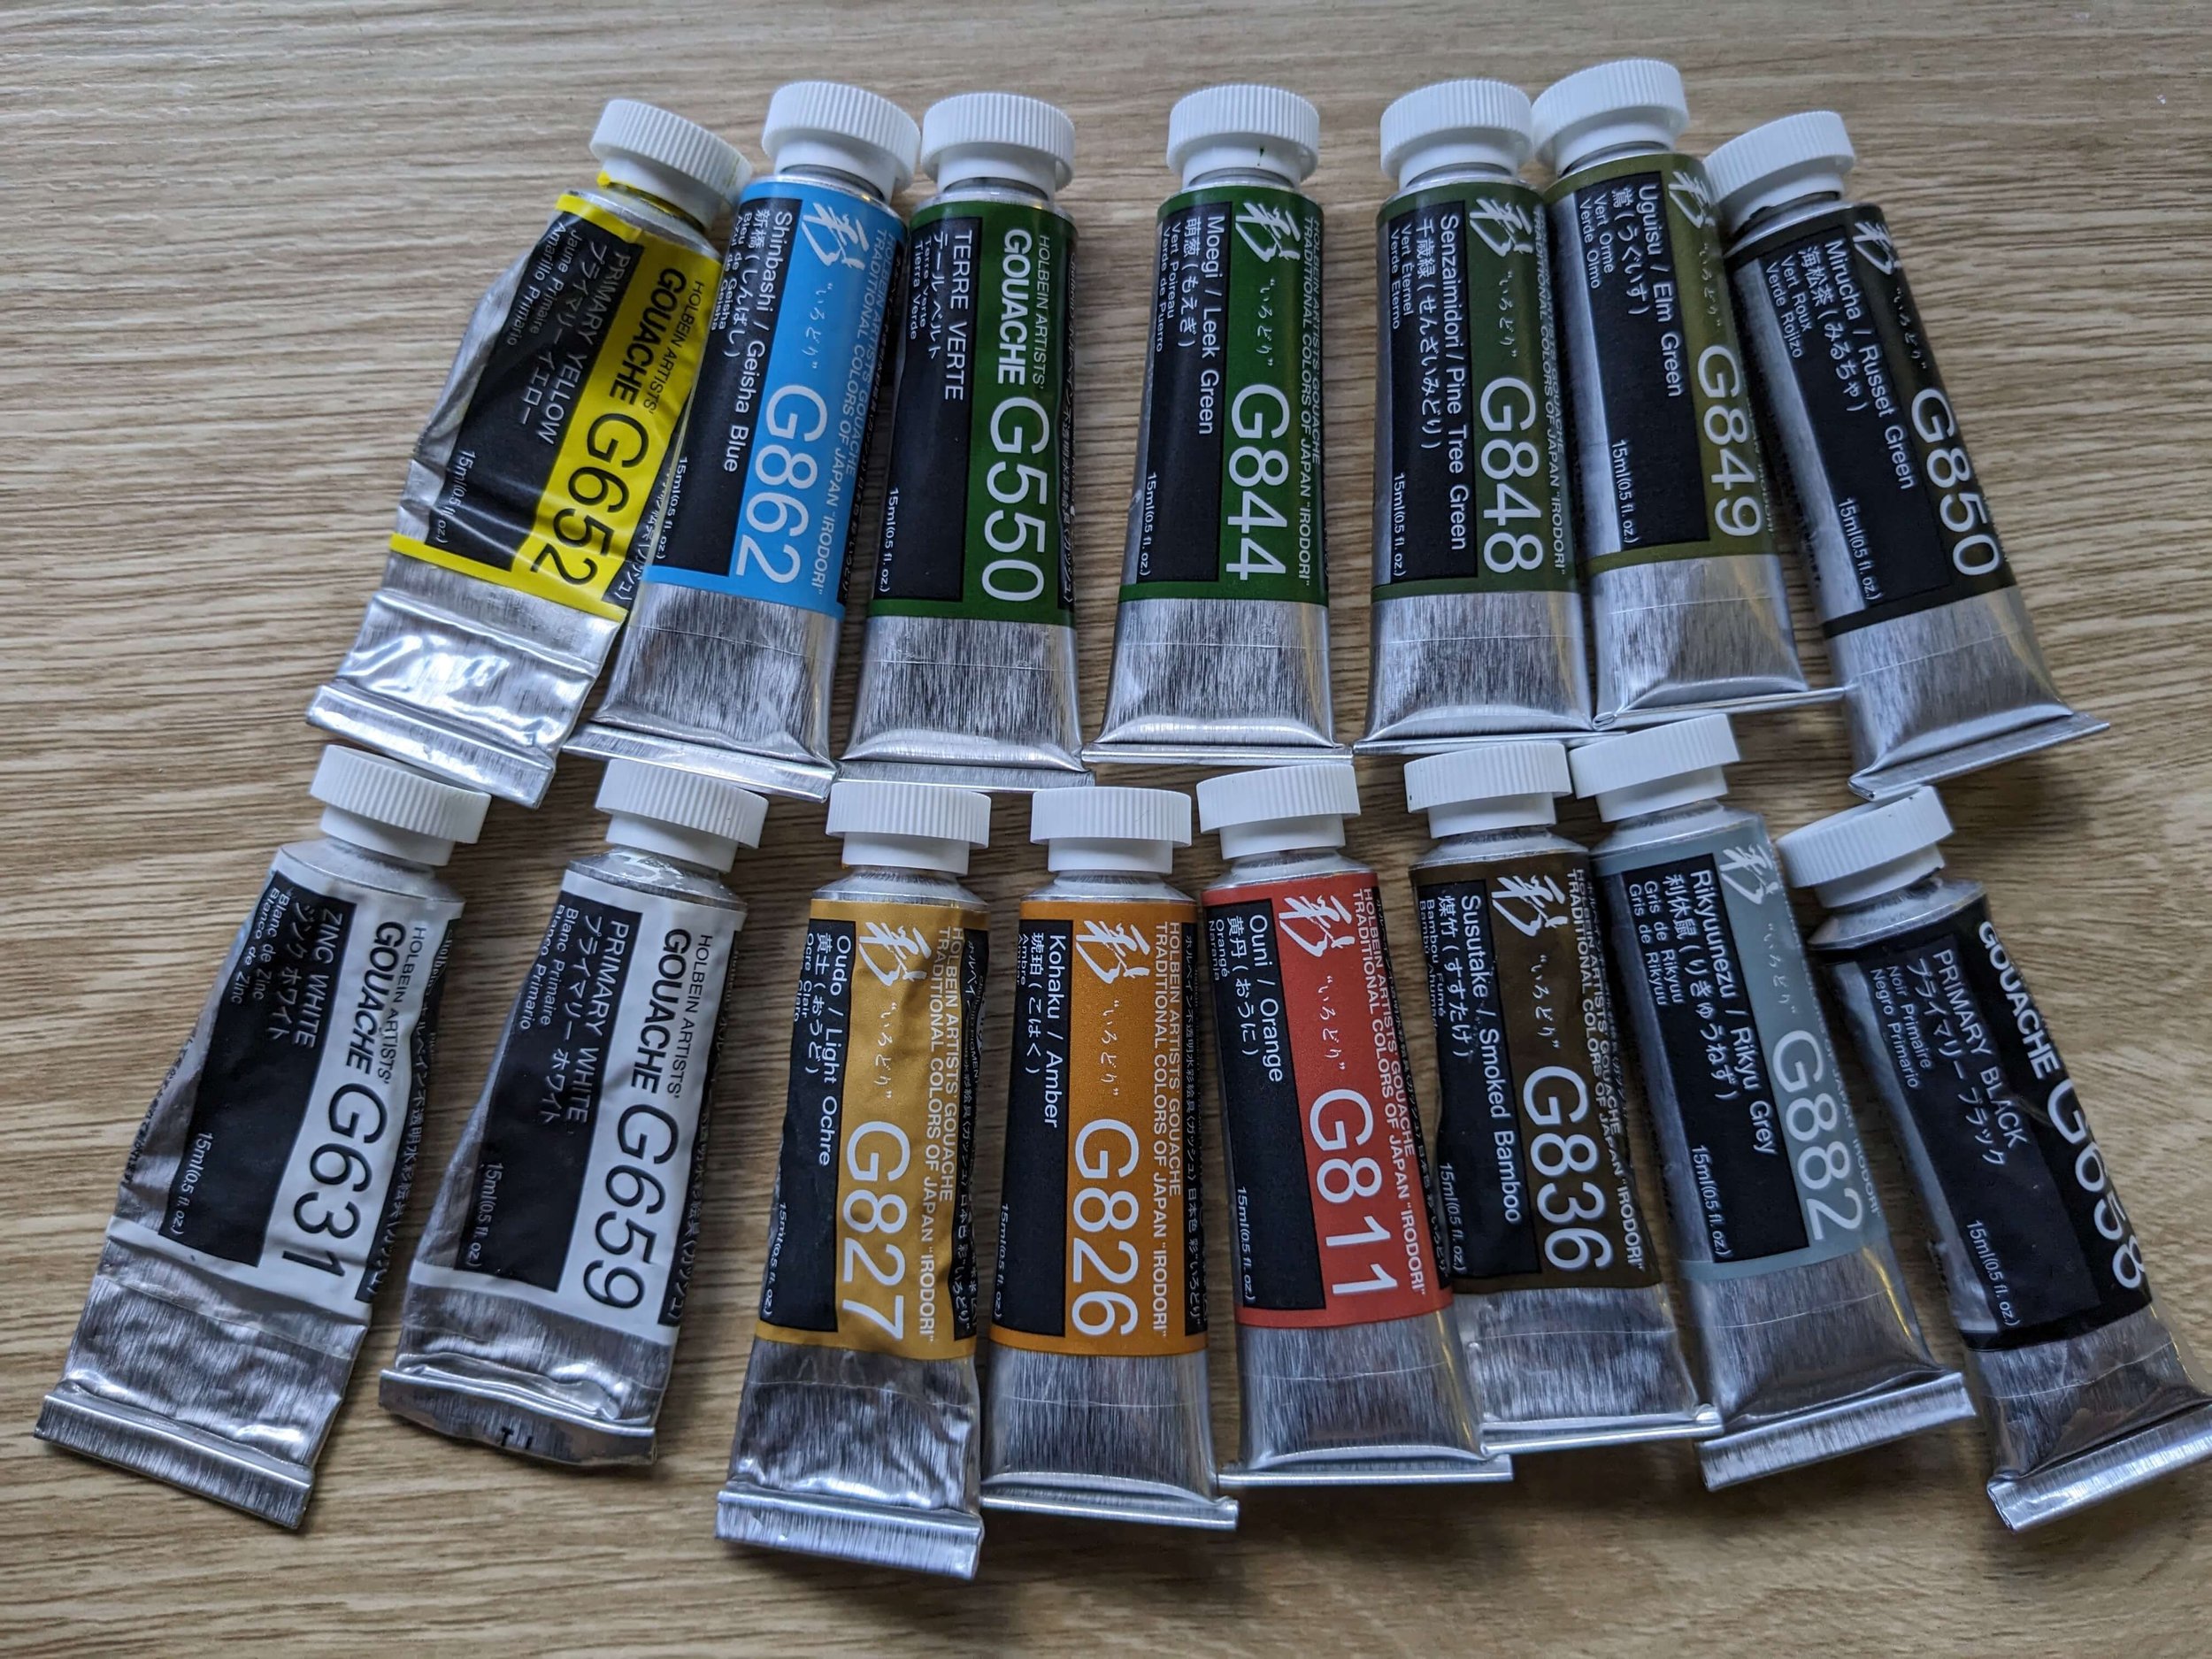
The main colours I used/tested were:
Shinbashi/Geisha Blue (Holbein Irodori Artists’ Gouache) for the sky
Rikyuunezu/Rikyu Grey (Holbein Irodori Artists’ Gouache) for the body of the Cuckoo
Primary White (Holbein Artists’ Gouache) for the bird and lightening various colours
Primary Black (Holbein Artists’ Gouache) for the bird and darkening various colours
Susutake/Smoked Bamboo (Holbein Irodori Artists’ Gouache) for darkening various colours and the branches
For the buff parts of the Cuckoo I used a combination of:
Kohaku/Amber (Holbein Irodori Artists’ Gouache)
Ouni/Orange (Holbein Irodori Artists' Gouache)
Oudo/Light Ochre (Holbein Irodori Artists' Gouache)
For the leaves I used a combination of:
Terre Verte (Holbein Artists’ Gouache)
Rokushou/Patina (Holbein Irodori Artists’ Gouache)
Mirucha/Russet Green (Holbein Irodori Artists’ Gouache)
Moegi/Leek Green (Holbein Irodori Artists’ Gouache)
Senzaimidori/Pine Tree Green (Holbein Irodori Artists' Gouache)
Uguisu/Elm Green (Holbein Irodori Artists' Gouache)
Primary Yellow (Holbein Irodori Artists’ Gouache)
Yes, this is a lot of colours! I would not normally recommend using this many colours and definitely won’t be making it a normal practice beyond testing out new colours in the next few weeks.
Process - Part 3: Paint the Channel-Billed Cuckoo
This was pretty difficult I have to admit, for two reasons:
Looking at multiple photo references and the Bird Guide to try to understand some parts of the bird I didn’t quite get
Getting the balance of detail and clarity right - there were a lot of times where the more detail I tried to add, the more muddled the feathers got. There was a lot of back and forth on this one, and I am hoping that by the end of this project, I am much more adept at painting fur and weathers in gouache in a variety of ways.

Process - Part 4: Refine, refine, refine
Similar to the above, the refining process was a bit of a challenge. A fun challenge, which is why I enjoy painting so much, but still a challenge.
I finally got to a paint where I was happy to pack it up and say it was done. Here is the final piece.

Next Week D: Double-barred Finches
I’m really looking forward to this one! We saw Double-Barred Finches everywhere up in the north of the Northern Territory and into Western Australia. Finches are always fun to paint and while I’ve sketched these a few times, I’ve yet to paint them.