
Painting Intermediate Egrets (maybe Plumed Egrets?) (Alphabet Superset Part 9)

Part 9: I - Intermediate Egret
Hello! So… awkward - it turns out the Intermediate Egret may not be a thing anymore given it has apparently been split into 3 separate species, with the one most commonly seen in Australia being the Plumed Egret. See the section on “What are Intermediate Egrets” below for more on this little blunder/new information (to me).
On the actual project: I am quite far behind on the schedule, and further behind on updating this blog about it, but the project is still ongoing. Currently, I have painted up to part 11 (K), and am working on L.
If this is your first time here and you have no idea what the Alphabet Superset Project is or why this is part 9, the first post in the series might help. But also, here is a quick recap:
Since the first week of September, the idea was that every week or so, I would paint an Australian animal or (an animal that visits Australia) and preferably one I have my own photos of (or Scott has photos of). Every week would be a different animal in alphabetical order i.e. week 1= A, week 2= B, week 3= C etc.
I am quite a few weeks behind for various reasons, but I will continue doing this until it is finished. The project was due to end in April 2024 but I may need to take it beyond that given I am behind. I am doing this as part of a project/challenge called the Alphabet Superset, the brainchild of Youtuber (among other things) Campbell Walker aka Struthless.
To find out more about the project, the best source is the Alphabet Superset page itself or Campbell Walker’s video about it. To see more of my paintings as part of this challenge and my progress, you can search for Alphabet Superset on this site or click on the Alphabet Superset category here or above.
Now, here’s part 9: Intermediate Egrets!
What are Intermediate Egrets? Are there even Intermediate Egrets anymore?
Intermediate Egrets (Ardea intermedia/Egretta intermedia) are white long-necked wading birds with yellow beaks. I’ll be perfectly honest, I found it (and still find it very hard) to tell different egrets apart unless they’re standing next to each other.
So…there were three recognised subspecies of the Intermediate Egret and in 2023 the IOC World Bird List accepted the split so Intermediate Egrets are now either: Medium Egrets (Ardea intermedia), Yellow-billed Egrets (Ardea brachyrhyncha) and Plumed Egrets (Ardea plumifera). The species most likely to be found in Australia is the Plumed Egret although the Medium Egret’s range also meets in Northern Australia. Either way. this change makes my Intermediate Egret ‘i’ painting somewhat redundant now but oh well. It was the Intermediate Egret when we took photos of them, and I did not realise it had changed until I was looking into writing this blog post so… I’m sticking with it for now. I may or may not do a different ‘i’ painting eventually :D
According to the Australian Bird Guide, Intermediate Egrets (as they were then known) are yellow-billed egrets and present in freshwater wetlands. They have a shorter bill than Great and Little Egrets. They also have more smoothly S-shaped necks than the Great Egret.
Their range according to the Bird Guide extends from northwest Western Australia all through the north of Australia and down through New South Wales, Victoria and sometimes through parts of South Australia.
References and for a bit more information about the Intermediate Egret/Plumed Egret and the changes:
The Australian Bird Guide, 2019 revised edition, CSIRO Publishing, (click here for my blog post about the bird guide)
IOC World Bird List - Note on the acceptance of the different species
2023 eBird Taxonomy Update - Information on the change and ranges
Where had we seen them?
We've seen these lovely birds in so many different places on our road trip particularly in/near various wetlands and billabongs around Darwin and in Kakadu. I’ve seen plenty of Egrets around other wetlands but as mentioned, its hard to tell them apart from other Egrets when unless they’re not all in the same place. Their reported range in the Bird Guide means I can only be confident the ones we’ve seen in north Australia were Intermediate Egrets.
Why Paint them?
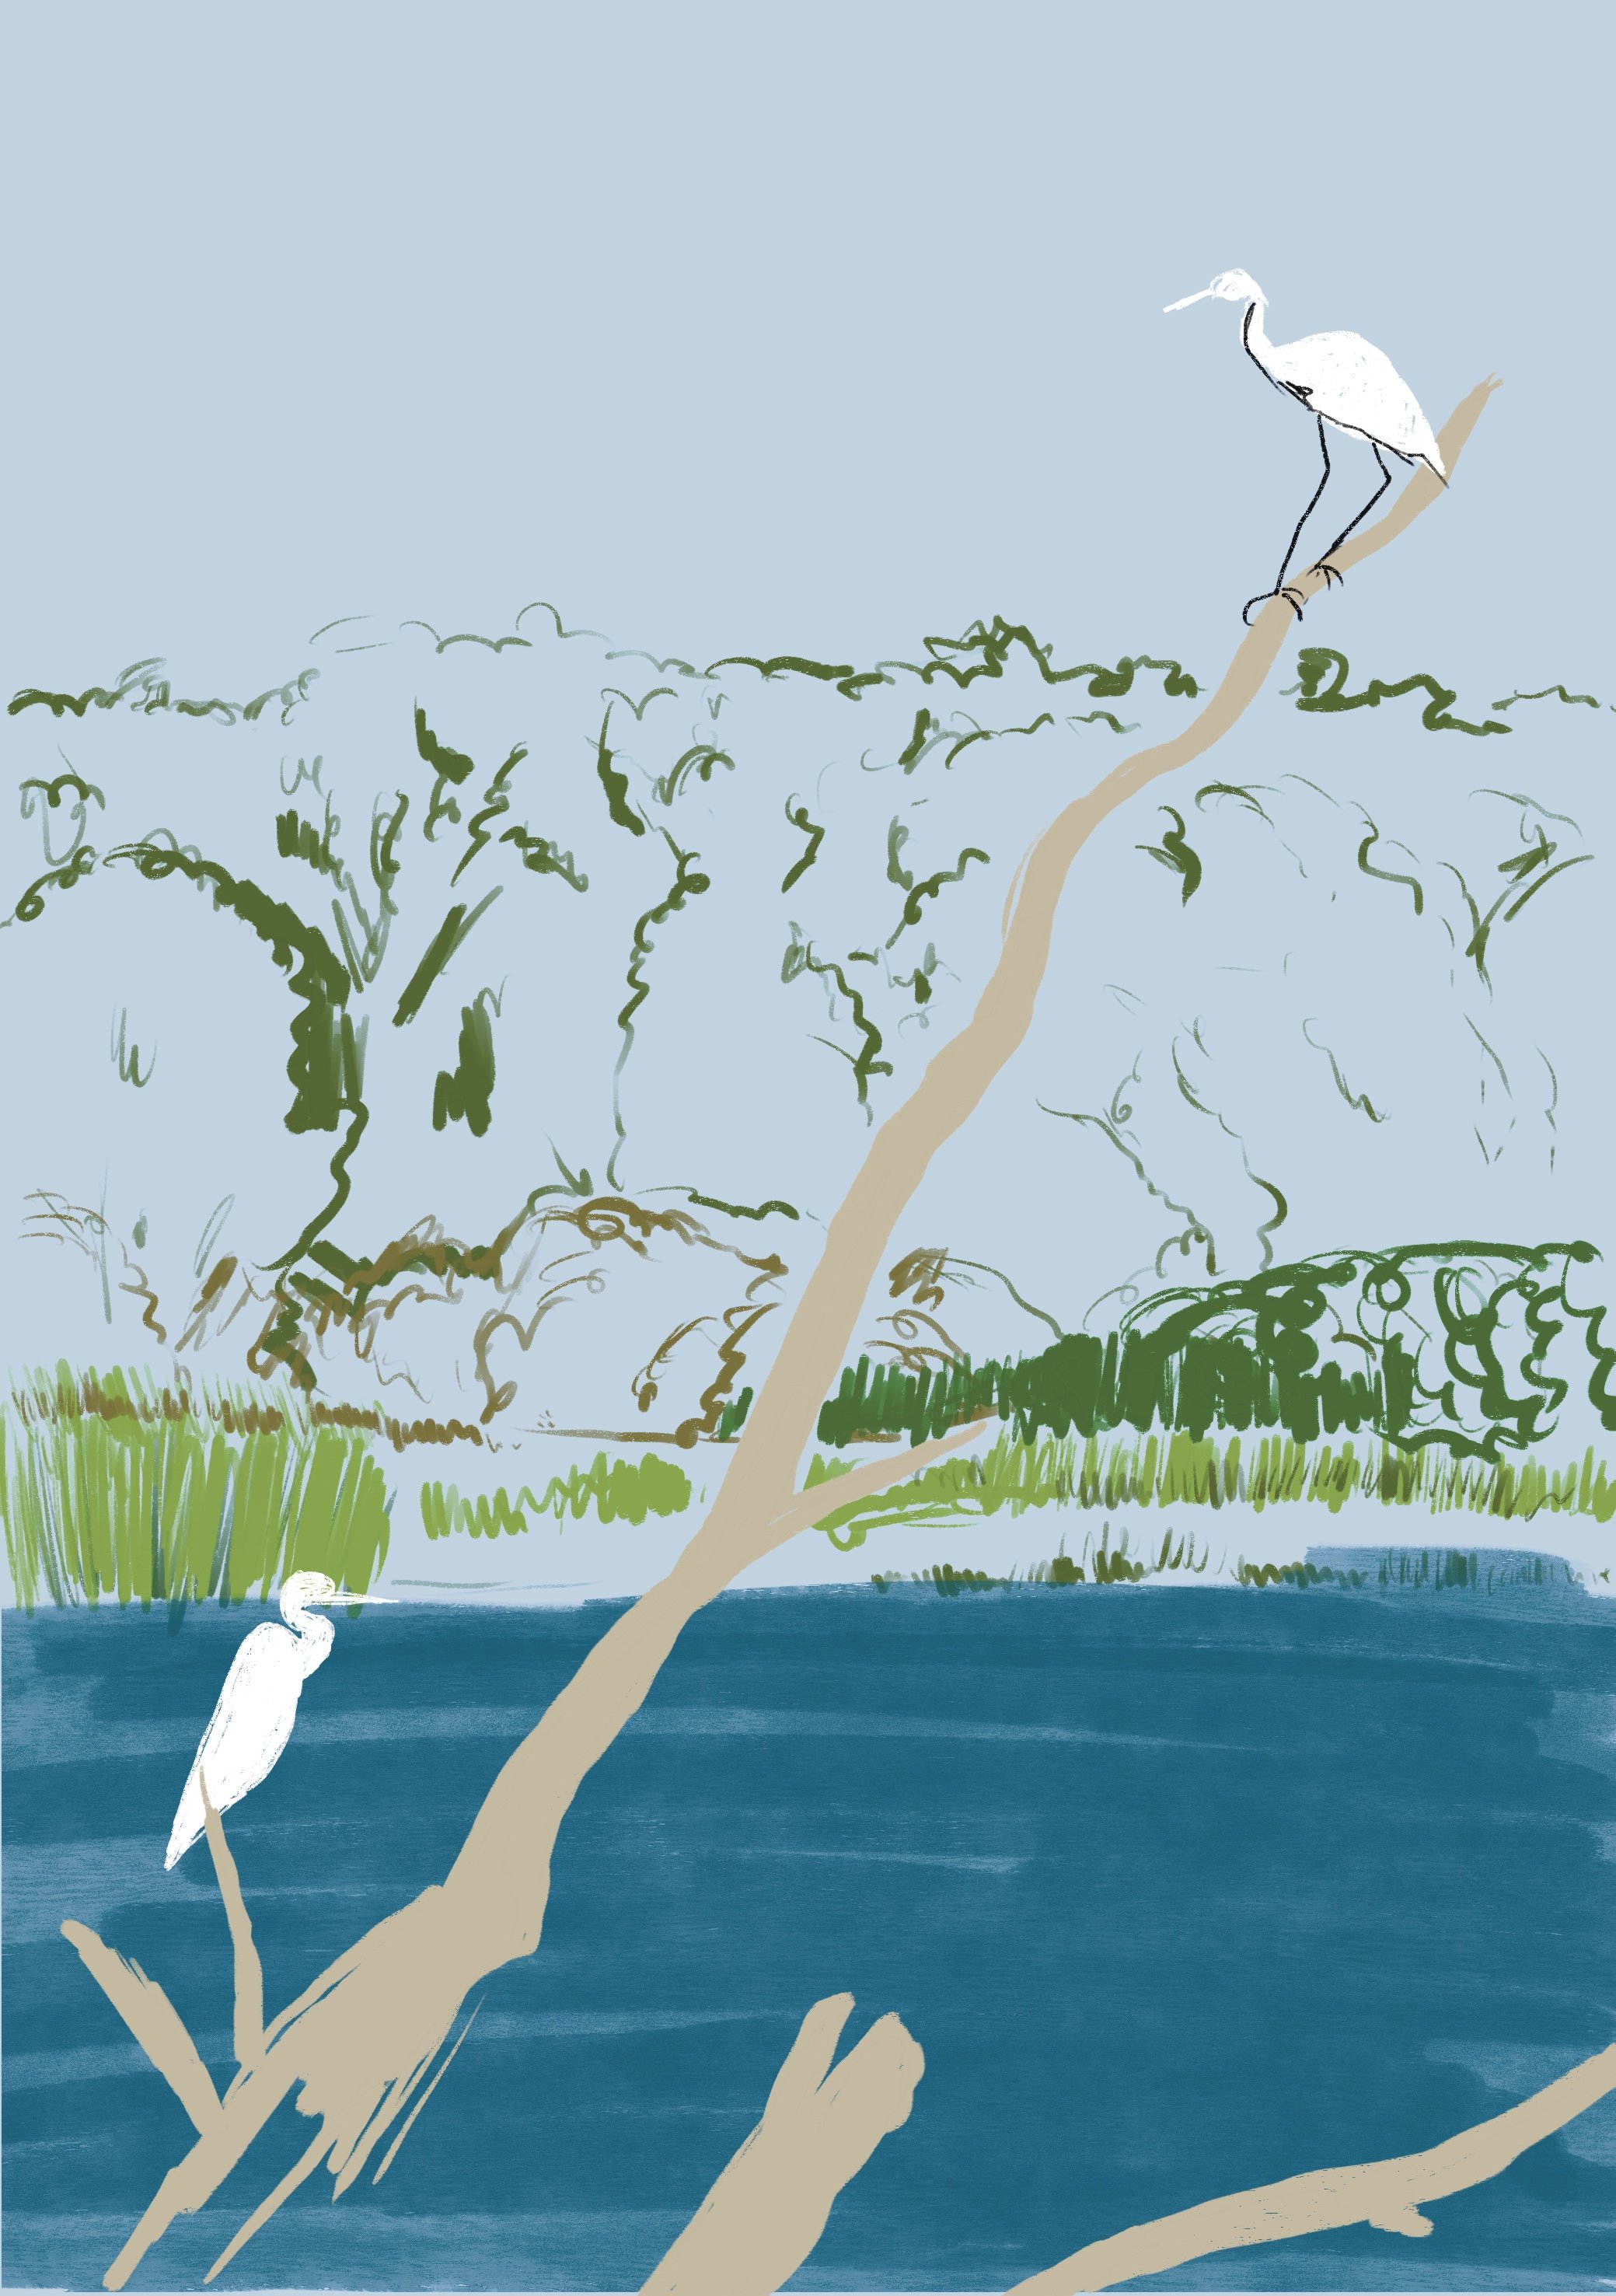
I’ll be honest, it was difficult to decide what to paint for the letter ‘i’. While I had a number of options, in the end what swung it towards Intermediate Egrets over say an Imperial Pigeon (Christmas Island ones of course) was that I had sketched and painted the Christmas Island Imperial Pigeon a few times while I was on the island, but I hadn’t really done many egrets. Looking through the reference photos I had cinched the deal where I rediscovered a couple of photos of two egrets on the protruding branches which were just too fun to pass.
Process - Part 1: Find Photo References, Sketch
Sketch 1 in Procreate
The photo references here were a combination of my reference photos and photos taken by Scott.

Sketch 2 in Procreate
In the process of deciding what to paint, the composition sort of picked itself. The photos of the egrets on branches were just waiting to be painted.
I modified the poses a bit and combined a few reference photos to get the final composition, but once I had the initial idea of the two egrets on a branch, the rest (other than the background) was comparatively easy.
Deciding on the background was a bit harder as we’d seen them in so many different wetland settings.
I ended up deciding on a simplified setting with a big wetland/lake to create a sense of distance in the painting, but I’m still not 100% happy with it.
I used Procreate on the iPad to sketch and test a couple of layouts shown here, although in the end I went with a sort of compromise between the two sketches.
Process - Part 2: Work out Colours, Paint the Background, Start Painting
I did not consciously try to use the Holbein Irodori sets with this one like I had been with my previous paintings partly because I already felt like I had a good handle of the sets and partly because I did not have them with me while I was away from home. So, the colours in this set were much more colours I’ve had in my main kit for over a year plus Shinbashi (my go-to sky base now), Rikyuunezu (I find this super useful and missed it when I didn’t have it on my for a few weeks) and Seiboku for the darker murky water.
For the greenery:
a variety of greens from Holbein
For the sky:
Shinbashi/Geisha Blue (Holbein Irodori Artists’ Gouache)
Primary White (Holbein Artists’ Gouache)
For the branches:
Rikyuunezu/Rikyu Grey (Holbeini Irodori Artists’ Gouache)
Susutake/Smoked Bamboo (Holbein Irodori Artists’ Gouache)
Bengara/Iron Oxide Red (Holbein Irodori Artists’ Gouache)
Primary Black (Holbein Artists’ Gouache)
Primary White (Holbein Artists’ Gouache)
For the water:
Seiboku/Blue Black (Holbein Irodori Artists’ Gouache)
Rikyuunezu/Rikyu Grey (Holbeini Irodori Artists’ Gouache)
Primary White (Holbein Artists’ Gouache)
For the Birds:
Primary Black (Holbein Artists’ Gouache)
Primary White (Holbein Artists’ Gouache)
Susutake/Smoked Bamboo (Holbein Irodori Artists’ Gouache)
Primary Yellow (Holbein Artists’ Gouache)

I was absolutely shocking with taking process photos for this painting! Here is the first one I took, with everything more or less already sketched (and painted) in.
Once I’d painted the background, I painted in the branches.
Process - Part 3: Painting the Egrets, Adjusting as I go

Egrets fully blocked in.
Similar to the previous painting, detail wasn’t the challenge with this one, but rather getting the shape and proportions of the egret right in relation to their surroundings as well as getting their legs looking right.
I did still need my trusty 20/0 Princeton Velvetouch Liner and the 5/0 Princeton Velvetouch Spotter for the legs and the beaks, but they’re becoming pretty standard in my gouache paintings now. They’re definitely in my travel brush kit.
Process - Part 4: Refine, Refine, Refine

The colours here are off, but you can see the mistake on the top of the middle branch - sadly, I took so few process photos that this is all I’ve got for this bit.
This part was surprisingly harder than I thought - I kept reworking the branches in the front, and the legs and I knew if I kept going, I’d ruin the piece, so I called it once I’d made a mistake that required adding me more branch bits to cover it. You can see the mistake in the middle branch here.
And here it is, finished!
Lessons Learnt & Thing I Might Try Going Forward
So, these are lessons in hindsight thinking back to when I actually finished painting this piece more than a month ago.
When painting something new, sketching a rough pencil sketch in first would help - or practicing the poses you want.
I’m still loving the style the series in bringing out for me, but I keep finding myself thinking about switching to doing the rest of this series in Procreate on the Ipad, both as a way to familiarise myself more with that medium, and to allow myself to play with a lot more detail. [Note: I did switch to ‘gouache’ in Procreate from J onwards]
Next: J - (Comb-crested) Jacana
J was actually one of the first ones I decided on - initially I thought I’d do the Jabiru, but then when I decided to put it together with the Brolgas in B (it is actually a Black-necked stork after all), the Jacana was immediately what I knew I had to paint in J-week. Look out for the next post, which will be slightly different because I’ll have switched to painting in Procreate on the Ipad!